I have been using my ASI174mm on my Lunt 100MT with the Ha filter wedge.

I can get a photo of the surface of the sun, but I cannot see any prominences on on the edge of the sun. I checked the NASA sites and there is one to be seen on the Northwest corner. But I cannot see it. I have been sliding the Exposure
, Gain, Contrast, Brightness, etc. no luck.

You need a much longer exposure than for imaging the surface, maybe 4x to 5x longer, possibly even more. Keep increasing the exposure until you see the proms.
JohnD

Should I be using ASICap to do this? If so, what are the values you use for Exposure, Gain, Contrast, Brightness, etc? I try moving the slider bars, but I never see any prominences. Help!

In looking more closely at your equipment it appears that you have a Lunt scope without the H-a module. I have not heard of a H-a filter wedge? If you mean a Herschel wedge, that is for white light solar only, not H-a. Your image appears to be a standard white light image. If you are trying to use a nighttime H-a filter in this configuration, that will not work. Please explain what attachments you are using on the scope.

JohnD

    johnpd Hi John. It’s highly likely, that I am misusing terms.

    Here are two photos. First one is what I call the wedge. It’s 1800 and the second photo shows the train of parts making up my telescope and seeing.

    [upl-image-preview url=https://bbs.astronomy-imaging-camera.com/assets/files/2022-08-08/1659992636-730268-69b58e76-0a47-4048-bf9e-f7c70bcbb25e.jpeg]
[upl-image-preview url=https://bbs.astronomy-imaging-camera.com/assets/files/2022-08-08/1659992636-846680-f2e61532-288e-497c-975e-11e0d4e898ea.jpeg]

    There was some miscoding of the links to the two new images which made them unaccessible. I had to extract the links from the page source.

    What you refer to as the "Wedge" is the H-a blocking Filter (B1800 model). The blocking filter is a standard accessory for viewing the Sun in H-a. I also see that you have a double stack H-a filter set, so you have the appropriate equipment to get the chromosphere layer of the Sun which would include prominences. I don't have any double stacked solar scopes so I am not that familiar with how to set them up. But having looked through some scopes so equipped, the Sun's surface is darker and more detailed, but prominences are fainter than with just a single filter.

    I am curious as to how you processed the solar image you displayed at the top. It does not look like a normal H-a image which normally would show much more surface detail. It looks more like a normal white light solar image. Since you were using a monochrome camera, I assume you colored your image yellow. There is a possibility that you have not properly "tuned" your double-stacked filters.

    I see you have also posted in the Cloudy Nights Solar Forum. That is probably a better place to ask your questions. The link to a YouTube video in there on how to take solar images is outstanding although it uses SharpCap instead of any ZWO software. You might want to post your image there as well as it might help. It mystifies me how you ended up with that result.

    JohnD

      johnpd thank you so much John, for your response.

      The double and single stacked filters are combined. They are supposed to be adjusted first, which I did. Nobody ever has a manual on how to adjust them.

      My camera, the ZWO ASI174mm seems to me, to be a really nice monochrome. Do you happen to know whether there is an even better monochrome that ZWO makes? A 533? A 6200? That I really NEED in order to get the prominences.

      Recently, I have been thinking about spending my time adjusting the darker areas (the sun’s edge) and bring up that dark detail.

      I colored my image yellow, by clicking a box in the ASI Studio app I was using. It offers a box for “sun color” only one box and no dials or sliders! That simple.

      the ASICap is what I used to capture the above image. I used my Lunt equipment to focus as sharp as I could, knowing the seeing as it was. It appeared to me, to be great. No clouds, no haze.

      Thanks again for your help.

      • w7ay replied to this.

        Danshep They are supposed to be adjusted first, which I did. Nobody ever has a manual on how to adjust them.

        To understand what a filter does, see this white paper:

        https://solarnutcase.livejournal.com/9896.html

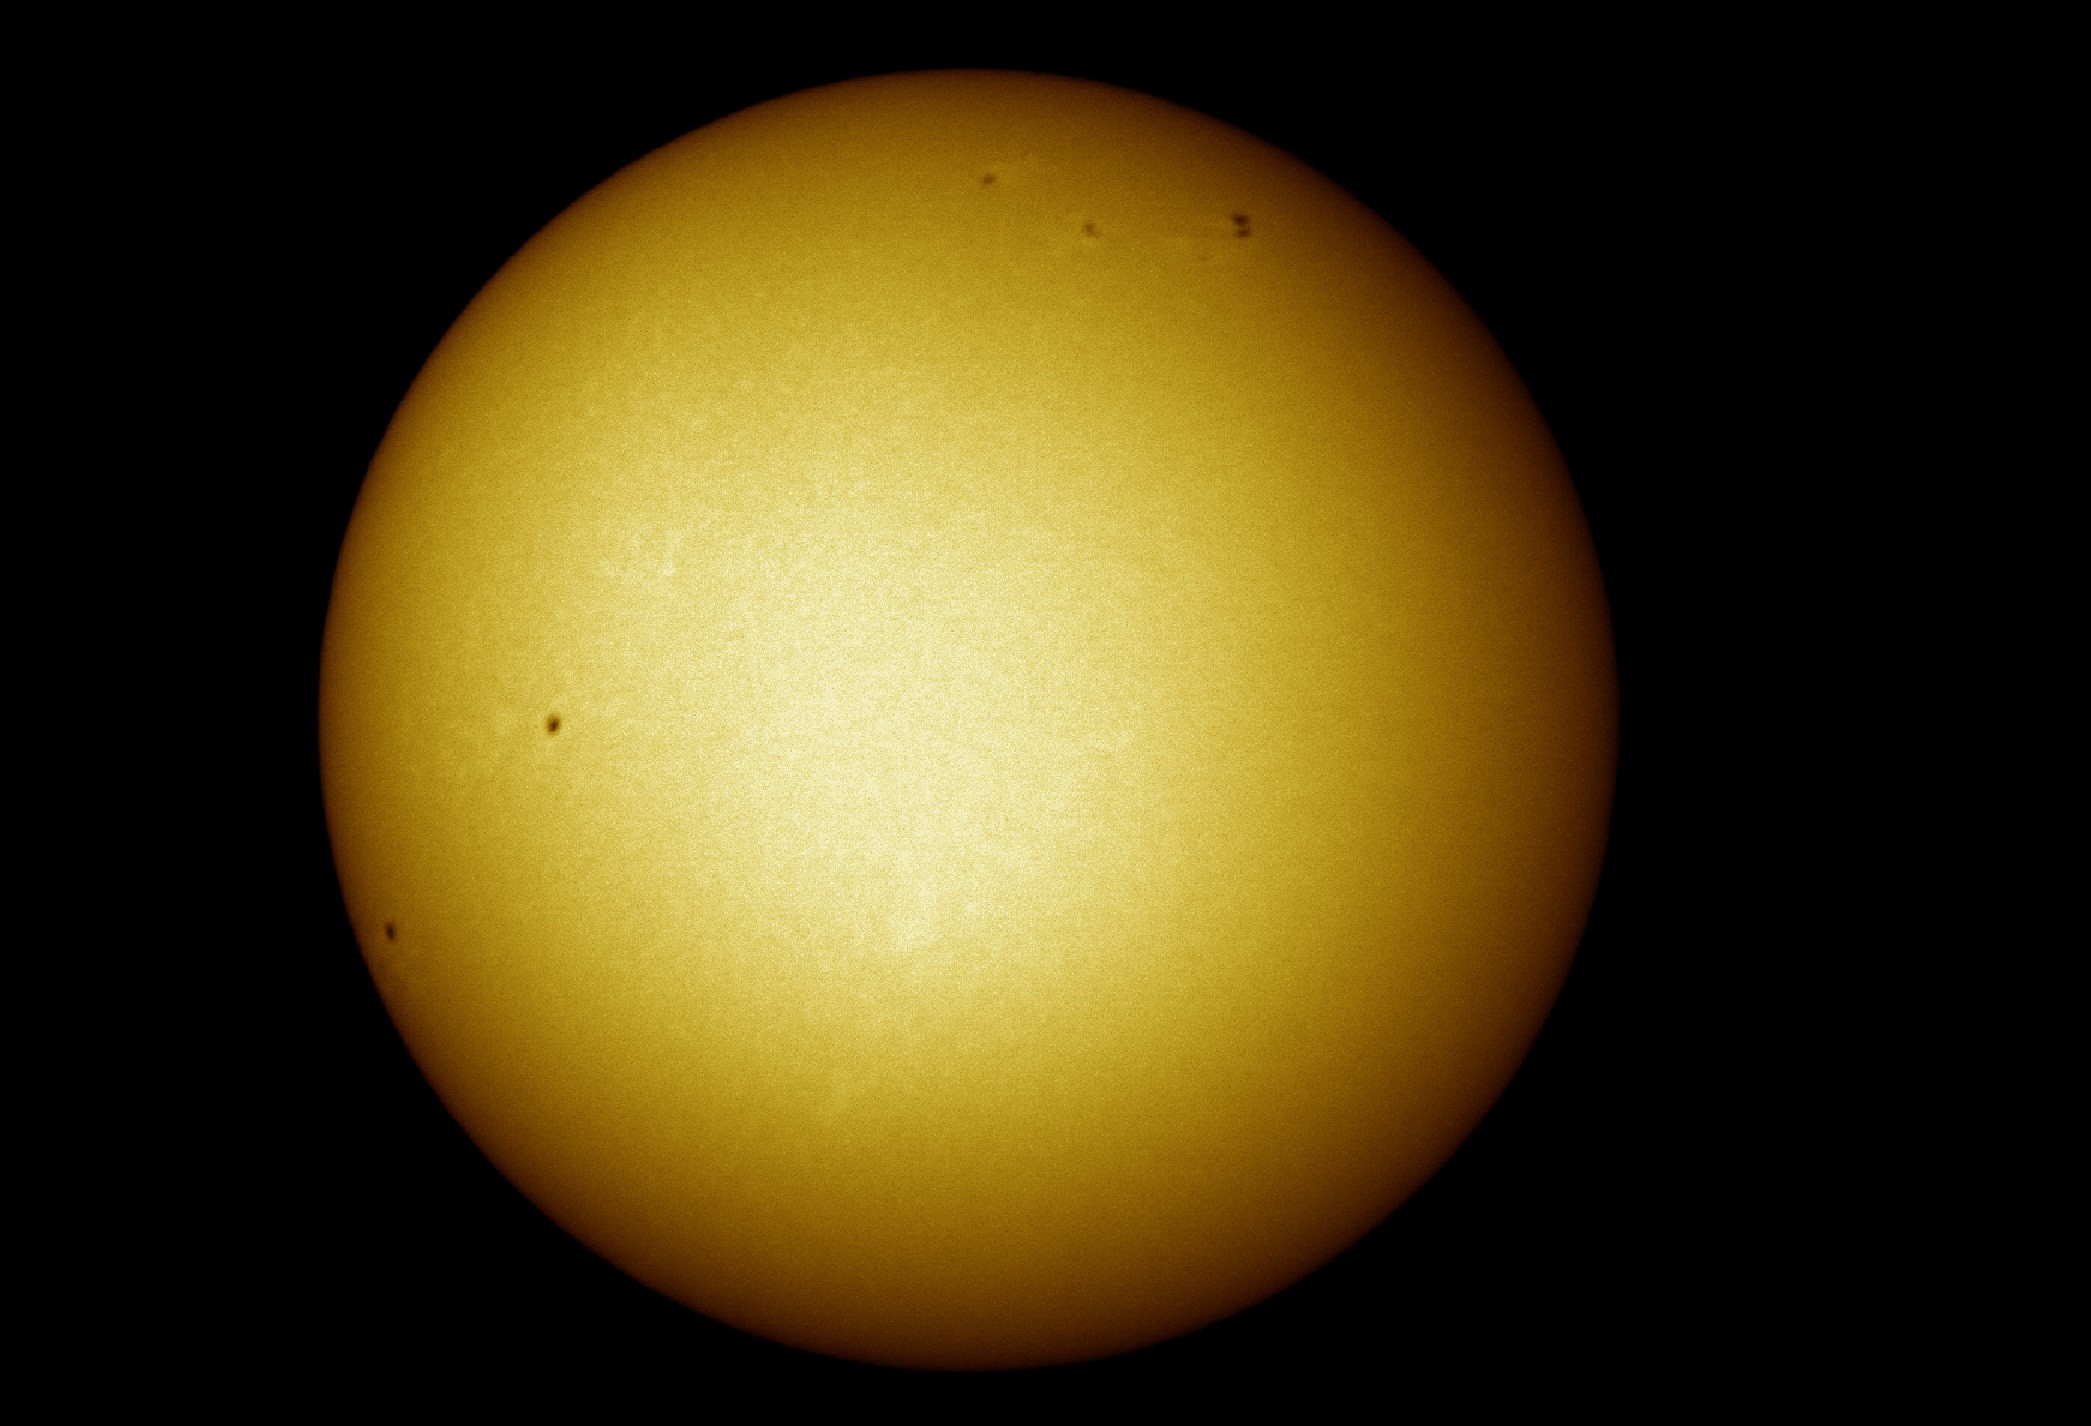
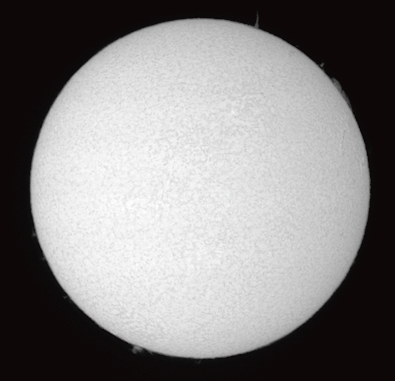
        You adjust your filter so that the center of the passband is perfectly centered at the Hα wavelength -- this will give you the best contrast since that will give you the best chromosphere vs the "noise" from the photosphere. I.e., tune it for best contrast. The chromosphere should just pop-out of the while photosphere as you tune through it.

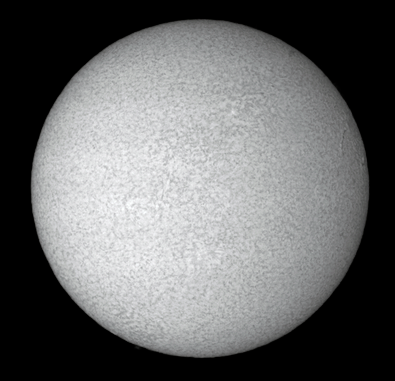
        You add the double stack to get even better contrast, since the filter is even narrower and has a lower Gaussian tail (the above article call it "wings," but I have always known them as "tails of a Gaussian" from my math courses).

        (This wiki page also calls them "tails" https://en.wikipedia.org/wiki/Sub-Gaussian_distribution .)

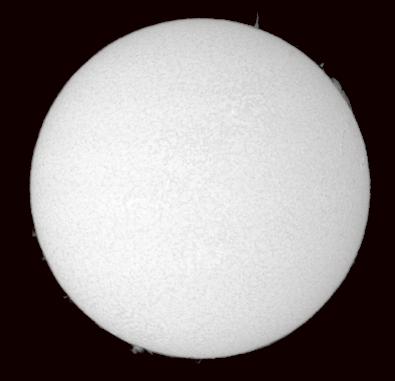
        That being said, you do not want to use a double stack filter to look for prominences.

        A bandwidth of 0.7 to 1 Ångström is better for prominences than a narrower double stacked filter, which often is in the 0.3 to 0.5 Ångström region.

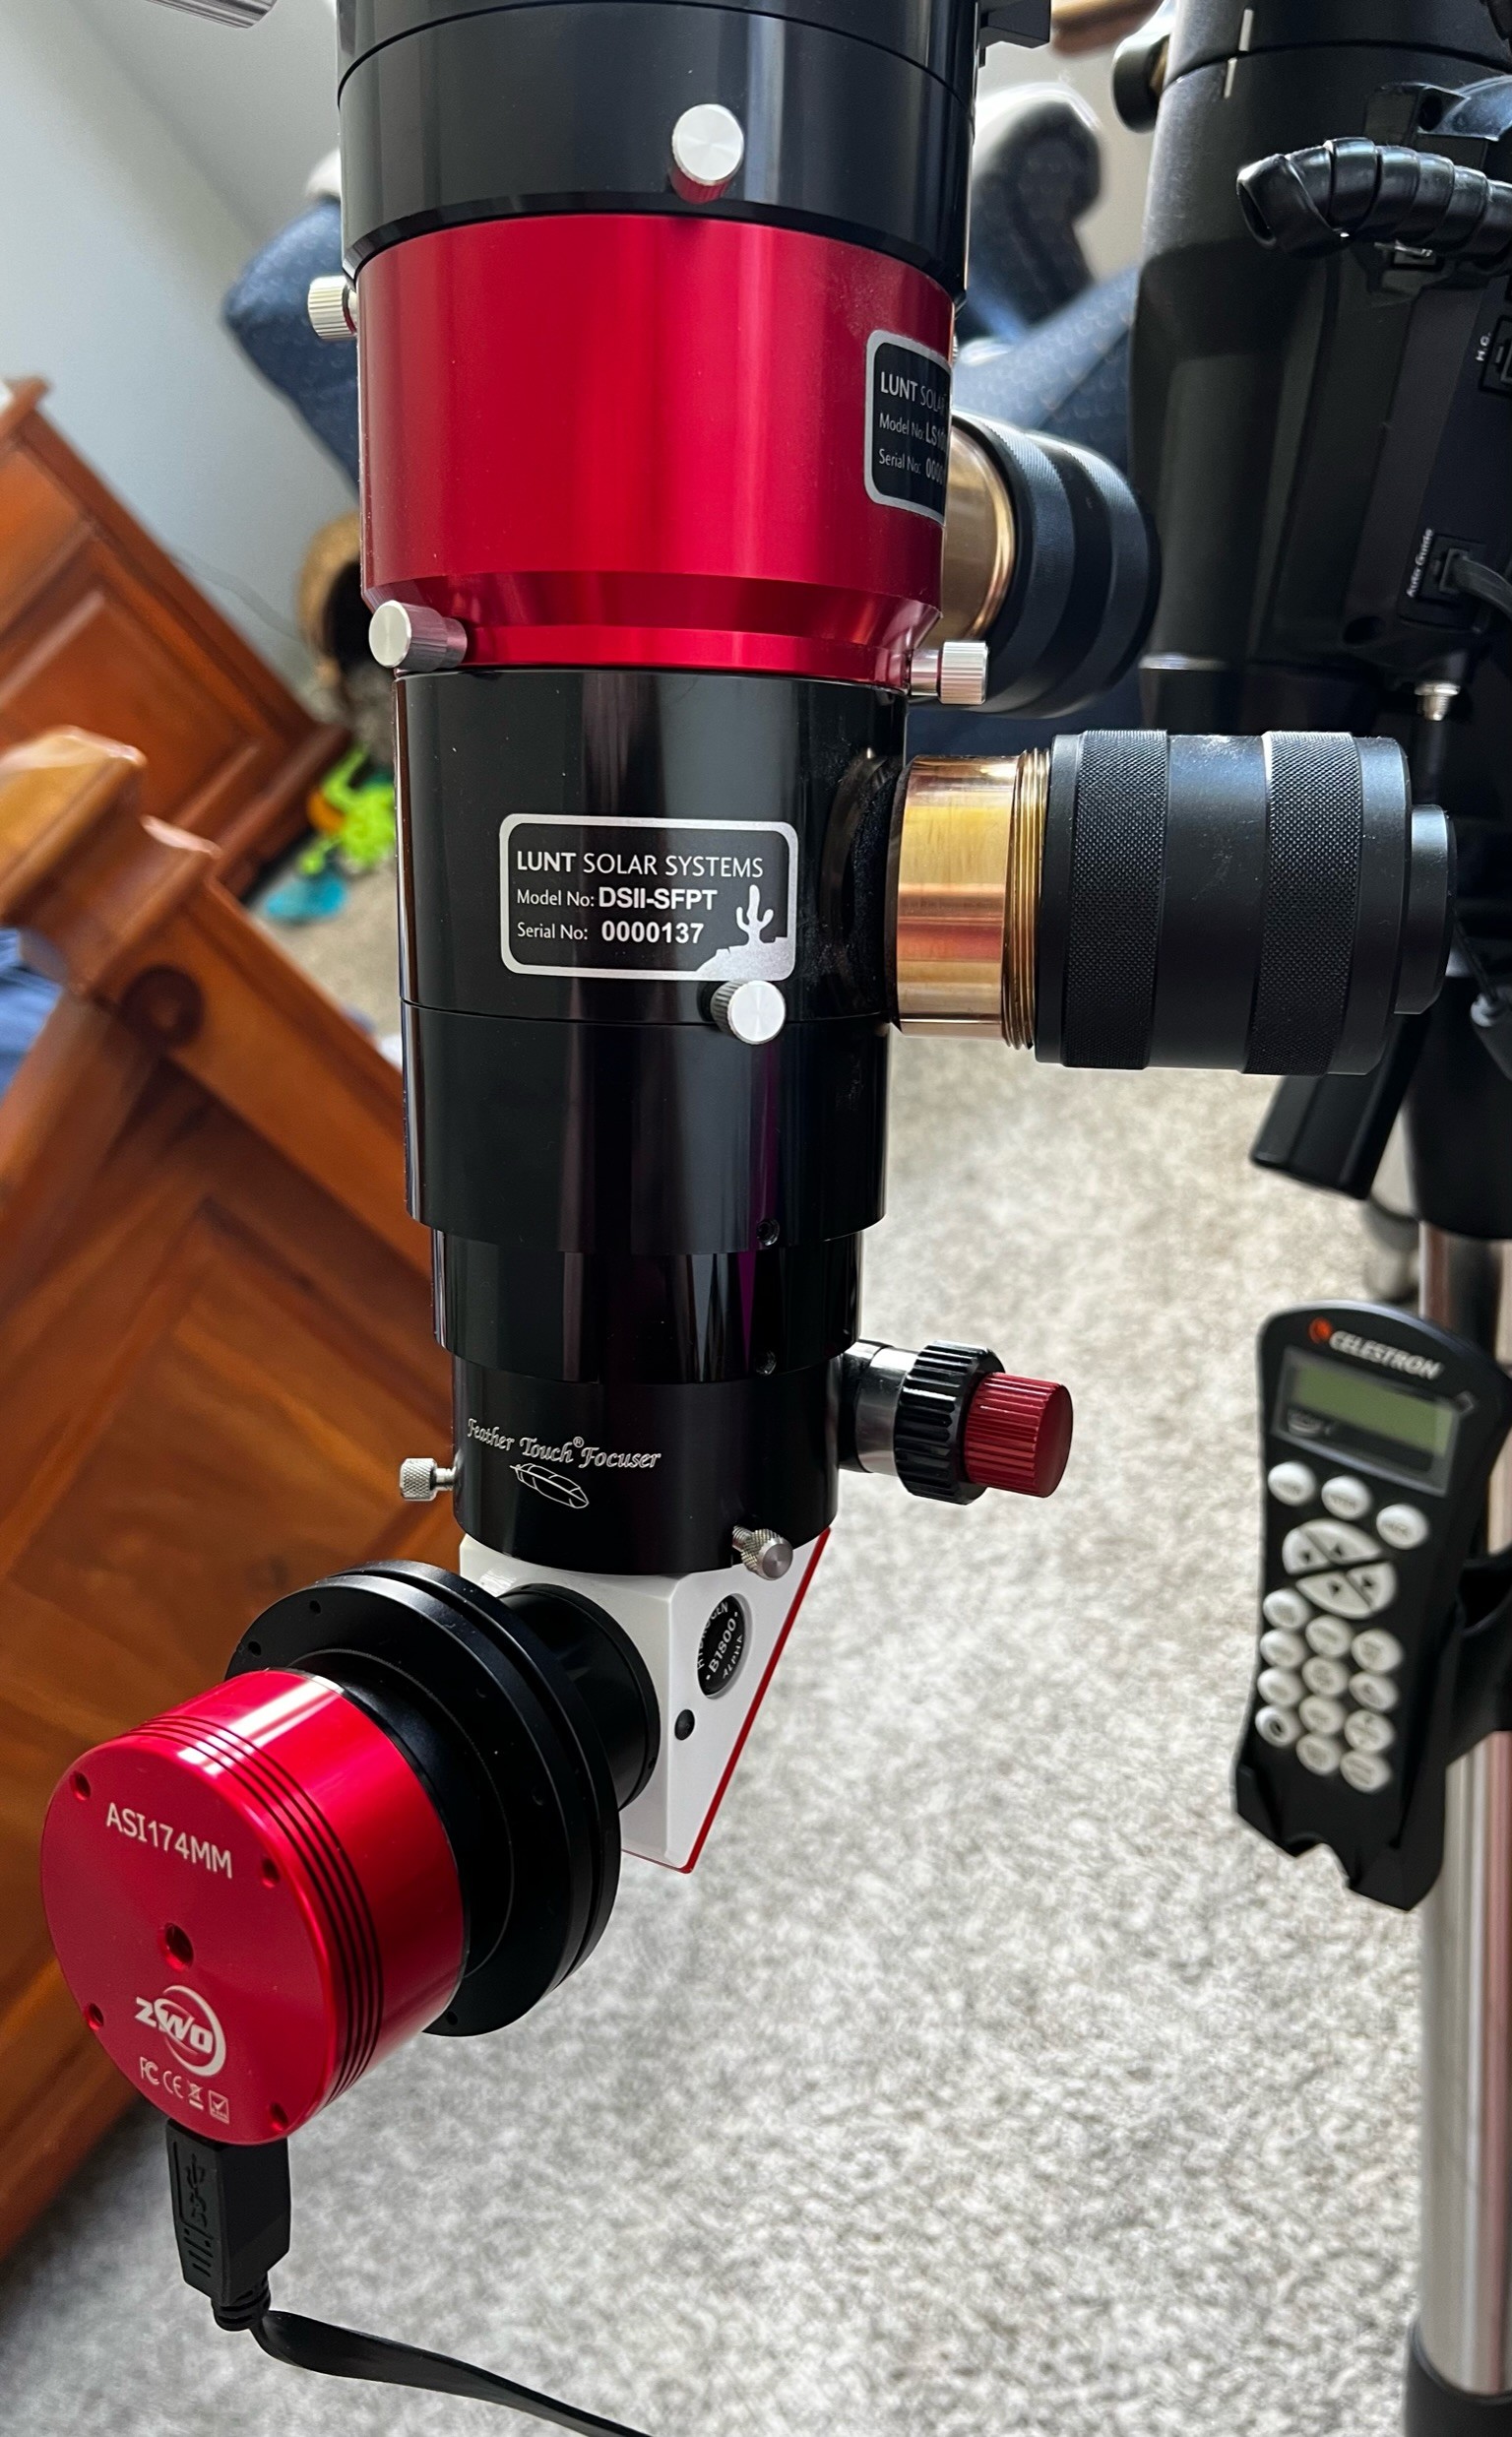
        If you can, remove the double stack, and use only a single stack (I don't know if that is possible with your set up -- I am not familiar with Lunt; I use a SolarScope SF-50 etalon).

        Switch back to a double stack to look at the chromosphere. That is what you paid the extra moolah for.

        Chen

        The ZWO ASI174MM is known as one of the best cameras for solar imaging. ZWO recently released a new monochrome camera (ASI432MM) which might be better, but there aren't any images or in-depth reviews out there yet to get an idea of how it might compare with the ASI174MM. It does have large pixels which is normally better for long focal length scopes. I am also looking for a solar camera and have these two in mind. I need to go up to our local astronomy shop to get their take on them.

        JohnD

        According to Lunt's web site they say:

        "The DS can be added to the Solar Telescope at a later date. The Telescope does not have to be returned to the factory. Double Stack systems are easy to install and remove allowing the user to use the scope at both bandwidths."

        As I recall these are modular components. The red module is the original single stack and the black module is the double stack. Here is a YouTube video showing someone adding a DSII module. You probably had to do this when you first put things together.

        [(https://www.youtube.com/watch?v=Eo34gv4HJ-Y)]

        As Chen said, you might want to try single stack initially to see if you are picking up everything.
        If you have any questions, call Lunt. They are very good and will answer any questions.

        JohnD

        Thank you, John and Chen.

        I coincidentally did call Lunt today and they said to take off the Double-stack for finding the prominences.

        From what they said, I think I got a prominence tonight.

        Thanks again; you guys are awesome. 😃

        • w7ay replied to this.

          Danshep they said to take off the Double-stack for finding the prominences.

          The reason is this... the prominences move faster than the chromosphere structures. And that produce greater Doppler shifts which will move the signal out of your passband if it is too narrow. Changing to a single stack, even though it does not remove as much of the photosphere (about 3 dB), at least won't remove the prominences completely. So, too much of a good thing is sometimes bad.

          Now that you can see the small prominences, you just have to wait for the spectaciular ones that will show up even better since they stick away from the photosphere (that brightish layer around the disk that causes your prominences to have low contrast). You can try tuning the center of the passband, too to maximize contrast of the prominence.

          My SF-50 etalon has just a small knurbed knob for adjustment; I always wished it has something larger so I can attach a motor (such as the EAF) to tune it from the air conditioned indoors.

          Anyway, you are there, my friend. Have fun.

          By the way, one of the most fun tool that I use with the Sun is a Hinode (Japanese for "Sunrise") solar tracker. Connects to the ST-4 port of a mount, and can track the Sun indefinitely once it locks in. Most time even relocking after a passing cloud. Hutech used to be the only distributor, but I think more distributors have caught on. Looks like this (white brick) on top of a Borg scope (black tube) and SF-50 etalon, controlling an EM-11 mount:

          Chen

          You could also try playing with the curves of your captured image.

          This is an image that I took back almost exacty 7 years ago:

          By adjusting the curve to favor the chromosphere, I get this (notice zero prominence):

          And by adjusting the curve to favor the prominence, I get this (notice chromsosphere is washed out):

          Both from the same captured image.

          You can see two different peaks in the histogram:

          Chen

            Getting better at prominences.

            The problem for me was that I did not really know about how to set the single-stack and double-stack filters. To be honest, I think the real problem was too many pieces to learn all at once.

            So anyway, I removed the double-stack and left only the single-stack. Then I tightened it all the way by hand and then started backing it off by small amount. I began to see the detail and focused on the solar flares.

            From there, it was just a matter of getting photos with my ASI174mm. Nice camera, IMO. I also commend the ASI Studio software, which made the education process just a bit easier. I like ASICap especially.

            Congrats Danshep. Enjoy your entrance into the world of solar imaging. Keep up the good work.

            JohnD

            P.S. I am envious of your equipment.

              Write a Reply...